Cómo instalar PrestaShop en CentOS 7
PrestaShop es el software de comercio electrónico gratuito más potente, dinámico y con todas las funciones, enriquecido con herramientas innovadoras. Es utilizado por más de 2.50.000 personas en todo el mundo para realizar sus tiendas online sin coste alguno. Se ha utilizado ampliamente en todo el mundo debido a su simplicidad y eficiencia.
Si está planeando comenzar con una tienda web en línea, entonces está en el lugar correcto. En este artículo, proporciono las pautas sobre cómo instalé PrestaShop en mi servidor CentOS 7 para construir mi tienda en línea.
Prerrequisitos
- Desactivar Selinux
- Instale la pila LAMP
- Crear una base de datos / usuario
- Confirmar la instalación de los módulos PHP GD, Mcrypt, Mbstring y PDO MySQL
1. Deshabilitar Selinux
Necesita editar el archivo de configuración de selinux ubicado en: / etc / selinux / config
Modificar el SELINUX parámetro a discapacitado y reinicie el servidor.
2. Instale la pila LAMP
Establecí un nombre de host adecuado para mi servidor y comencé con la instalación de LAMP. Primero, instale Apache.
[root@server1 ~]# yum install httpd -y
Esto instalará todos los paquetes de Apache necesarios. Asegúrese de que esté habilitado y funcionando en el servidor.
root@server1 ~]# systemctl enable httpd
ln -s '/usr/lib/systemd/system/httpd.service' '/etc/systemd/system/multi-user.target.wants/httpd.service'

[root@server1~]# systemctl status httpd.service
httpd.service - The Apache HTTP Server
Loaded: loaded (/usr/lib/systemd/system/httpd.service; enabled)
Active: active (running) since Tue 2016-02-23 09:18:28 UTC; 2s ago
Docs: man:httpd(8)
man:apachectl(8)
Process: 15550 ExecStop=/bin/kill -WINCH ${MAINPID} (code=exited, status=0/SUCCESS)
Main PID: 15561 (httpd)
Status: "Processing requests..."
CGroup: /system.slice/httpd.service
├─15561 /usr/sbin/httpd -DFOREGROUND
├─15562 /usr/sbin/httpd -DFOREGROUND
├─15563 /usr/sbin/httpd -DFOREGROUND
├─15564 /usr/sbin/httpd -DFOREGROUND
├─15565 /usr/sbin/httpd -DFOREGROUND
└─15566 /usr/sbin/httpd -DFOREGROUND
Ahora cree el VHOST para el dominio en el que estamos planeando instalar Prestashop. Estoy instalando Prestashop para mi dominio saheetha.com.
Aquí está mi Vhost para el dominio. Asegúrese de crear la raíz del documento y las carpetas de registro, aquí está /var/www/saheetha.com/public_html/ y /var/www/saheetha.com/logs/ antes de reiniciar Apache.
[root@server1 ~]# cat /etc/httpd/conf.d/vhost.conf
NameVirtualHost *:80
<VirtualHost 139.162.54.130:80>
ServerAdmin webmaster@saheetha.com
ServerName saheetha.com
ServerAlias www.saheetha.com
DocumentRoot /var/www/saheetha.com/public_html/
ErrorLog /var/www/saheetha.com/logs/error.log
CustomLog /var/www/saheetha.com/logs/access.log combined
</VirtualHost>
Ahora instale MySQL, estoy instalando MySQL 5.5. Descargue su Repositorio de la Comunidad MySQL en su distribución de Linux. Descargué el último repositorio de MySQL. E instalé MySQL 5.5 en mi servidor. Consulte los pasos que realicé para elegir la versión requerida.
[root@server1 ~]# wget http://dev.mysql.com/get/mysql57-community-release-el7-7.noarch.rpm
[root@server1 ~]# yum localinstall mysql57-community-release-el7-7.noarch.rpm
root@server1 ~]# yum install -y yum-utils *//Install the yum-utility packages //*

[root@server1 ~]# yum repolist enabled | grep "mysql.*-community.*" *//Checked the enabled repo before installation //*
mysql-connectors-community/x86_64 MySQL Connectors Community 17
mysql-tools-community/x86_64 MySQL Tools Community 31
mysql57-community/x86_64 MySQL 5.7 Community Server 56

[root@server1 ~]# yum-config-manager --disable mysql57-community *//Disabling MySQL 5.7 repo from installing*//

Loaded plugins: fastestmirror
=========================================================== repo: mysql57-community ===========================================================
[mysql57-community]
async = True
bandwidth = 0
base_persistdir = /var/lib/yum/repos/x86_64/7
baseurl = http://repo.mysql.com/yum/mysql-5.7-community/el/7/x86_64/
cache = 0
cachedir = /var/cache/yum/x86_64/7/mysql57-community
check_config_file_age = True
cost = 1000
deltarpm_metadata_percentage = 100
deltarpm_percentage =
enabled = 0
enablegroups = True
exclude =
failovermethod = priority
gpgcadir = /var/lib/yum/repos/x86_64/7/mysql57-community/gpgcadir
gpgcakey =
gpgcheck = True
gpgdir = /var/lib/yum/repos/x86_64/7/mysql57-community/gpgdir
gpgkey = file:///etc/pki/rpm-gpg/RPM-GPG-KEY-mysql
hdrdir = /var/cache/yum/x86_64/7/mysql57-community/headers
http_caching = all
includepkgs =
ip_resolve =
keepalive = True
keepcache = False
mddownloadpolicy = sqlite
mdpolicy = group:small
mediaid =
metadata_expire = 21600
metadata_expire_filter = read-only:present
metalink =
minrate = 0
mirrorlist =
mirrorlist_expire = 86400
name = MySQL 5.7 Community Server
old_base_cache_dir =
password =
persistdir = /var/lib/yum/repos/x86_64/7/mysql57-community
pkgdir = /var/cache/yum/x86_64/7/mysql57-community/packages
proxy = False
proxy_dict =
proxy_password =
proxy_username =
repo_gpgcheck = False
retries = 10
skip_if_unavailable = False
ssl_check_cert_permissions = True
sslcacert =
sslclientcert =
sslclientkey =
sslverify = True
throttle = 0
timeout = 30.0
ui_id = mysql57-community/x86_64
ui_repoid_vars = releasever,
basearch
username =

[root@server1 ~]# yum-config-manager --enable mysql55-community *//Enabling the MySQL 5.5 Repo from the Yum repository //*
Loaded plugins: fastestmirror
=========================================================== repo: mysql55-community ===========================================================
[mysql55-community]
async = True
bandwidth = 0
base_persistdir = /var/lib/yum/repos/x86_64/7
baseurl = http://repo.mysql.com/yum/mysql-5.5-community/el/7/x86_64/
cache = 0
cachedir = /var/cache/yum/x86_64/7/mysql55-community
check_config_file_age = True
cost = 1000
deltarpm_metadata_percentage = 100
deltarpm_percentage =
enabled = 1
enablegroups = True
exclude =
failovermethod = priority
gpgcadir = /var/lib/yum/repos/x86_64/7/mysql55-community/gpgcadir
gpgcakey =
gpgcheck = True
gpgdir = /var/lib/yum/repos/x86_64/7/mysql55-community/gpgdir
gpgkey = file:///etc/pki/rpm-gpg/RPM-GPG-KEY-mysql
hdrdir = /var/cache/yum/x86_64/7/mysql55-community/headers
http_caching = all
includepkgs =
ip_resolve =
keepalive = True
keepcache = False
mddownloadpolicy = sqlite
mdpolicy = group:small
mediaid =
metadata_expire = 21600
metadata_expire_filter = read-only:present
metalink =
minrate = 0
mirrorlist =
mirrorlist_expire = 86400
name = MySQL 5.5 Community Server
old_base_cache_dir =
password =
persistdir = /var/lib/yum/repos/x86_64/7/mysql55-community
pkgdir = /var/cache/yum/x86_64/7/mysql55-community/packages
proxy = False
proxy_dict =
proxy_password =
proxy_username =
repo_gpgcheck = False
retries = 10
skip_if_unavailable = False
ssl_check_cert_permissions = True
sslcacert =
sslclientcert =
sslclientkey =
sslverify = True
throttle = 0
timeout = 30.0
ui_id = mysql55-community/x86_64
ui_repoid_vars = releasever,
basearch
username =

[root@localhost ~]# yum repolist enabled | grep "mysql.*-community.*" *//Confirm the enabled MySQL repo versions //*
mysql-connectors-community/x86_64 MySQL Connectors Community 17
mysql-tools-community/x86_64 MySQL Tools Community 31
mysql55-community/x86_64 MySQL 5.5 Community Server 199
Now install the MySQL 5.5 from the Repo.

[root@server1~]# yum install mysql-community-server
Después de completar la instalación, inicie el servicio MySQL y confirme su estado.
[root@server1 ~]# service mysqld start
Redirecting to /bin/systemctl start mysqld.service
[root@server1 ~]#
[root@server1 ~]#
[root@server1 ~]# systemctl status mysqld.service
mysqld.service - MySQL Community Server
Loaded: loaded (/usr/lib/systemd/system/mysqld.service; disabled)
Active: active (running) since Tue 2016-02-23 09:27:44 UTC; 8s ago
Process: 15717 ExecStartPost=/usr/bin/mysql-systemd-start post (code=exited, status=0/SUCCESS)
Process: 15664 ExecStartPre=/usr/bin/mysql-systemd-start pre (code=exited, status=0/SUCCESS)
Main PID: 15716 (mysqld_safe)
CGroup: /system.slice/mysqld.service
├─15716 /bin/sh /usr/bin/mysqld_safe
└─15862 /usr/sbin/mysqld --basedir=/usr --datadir=/var/lib/mysql --plugin-dir=/usr/lib64/mysql/plugin --log-error=/var/log/mysqld...

Feb 23 09:27:42 server1.centos7-test.com mysql-systemd-start[15664]: Alternatively you can run:
Feb 23 09:27:42 server1.centos7-test.com mysql-systemd-start[15664]: /usr/bin/mysql_secure_installation
Feb 23 09:27:42 server1.centos7-test.com mysql-systemd-start[15664]: which will also give you the option of removing the test
Feb 23 09:27:42 server1.centos7-test.com mysql-systemd-start[15664]: databases and anonymous user created by default. This is
Feb 23 09:27:42 server1.centos7-test.com mysql-systemd-start[15664]: strongly recommended for production servers.
Feb 23 09:27:42 server1.centos7-test.com mysql-systemd-start[15664]: See the manual for more instructions.
Feb 23 09:27:42 server1.centos7-test.com mysql-systemd-start[15664]: Please report any problems at http://bugs.mysql.com/
Feb 23 09:27:42 server1.centos7-test.com mysqld_safe[15716]: 160223 09:27:42 mysqld_safe Logging to '/var/log/mysqld.log'.
Feb 23 09:27:42 server1.centos7-test.com mysqld_safe[15716]: 160223 09:27:42 mysqld_safe Starting mysqld daemon with databases from /v.../mysql
Feb 23 09:27:44 server1.centos7-test.com systemd[1]: Started MySQL Community Server.
Hint: Some lines were ellipsized, use -l to show in full.

[root@server1 ~]# mysql --version
mysql Ver 14.14 Distrib 5.5.48, for Linux (x86_64) using readline 5.1
Ahora puede ejecutar el script de instalación segura de MySQL para asegurar su instalación de MySQL eliminando el inicio de sesión de root remoto, configurando la contraseña de root, deshabilitando usuarios anónimos, etc., según sea necesario.
root@server1 ~]# mysql_secure_installation
NOTE: RUNNING ALL PARTS OF THIS SCRIPT IS RECOMMENDED FOR ALL MySQL
SERVERS IN PRODUCTION USE! PLEASE READ EACH STEP CAREFULLY!
In order to log into MySQL to secure it, we'll need the current
password for the root user. If you've just installed MySQL, and
you haven't set the root password yet, the password will be blank,
so you should just press enter here.

Enter current password for root (enter for none):
OK, successfully used password, moving on...

Setting the root password ensures that nobody can log into the MySQL
root user without the proper authorisation.

Set root password? [Y/n] y
New password:
Re-enter new password:
Password updated successfully!
Reloading privilege tables..
... Success!
By default, a MySQL installation has an anonymous user, allowing anyone
to log into MySQL without having to have a user account created for
them. This is intended only for testing, and to make the installation
go a bit smoother. You should remove them before moving into a
production environment.

Remove anonymous users? [Y/n] y
... Success!

Normally, root should only be allowed to connect from 'localhost'. This
ensures that someone cannot guess at the root password from the network.

Disallow root login remotely? [Y/n] y
... Success!

By default, MySQL comes with a database named 'test' that anyone can
access. This is also intended only for testing, and should be removed
before moving into a production environment.

Remove test database and access to it? [Y/n] n
... skipping.

Reloading the privilege tables will ensure that all changes made so far
will take effect immediately.

Reload privilege tables now? [Y/n] y
... Success!

Cleaning up...

All done! If you've completed all of the above steps, your MySQL
installation should now be secure.

Thanks for using MySQL!
Ahora es el momento de PHP. Instale PHP con todos los módulos necesarios.
[root@server1 ~]# yum install php-mcrypt php php-common php-pdo php-cli php-mysql php-gd php-xml libtool-ltdl mhash mcrypt -y

[root@server1 ~]# php -v
PHP 5.4.16 (cli) (built: Jun 23 2015 21:17:27)
Copyright (c) 1997-2013 The PHP Group
Zend Engine v2.4.0, Copyright (c) 1998-2013 Zend Technologies
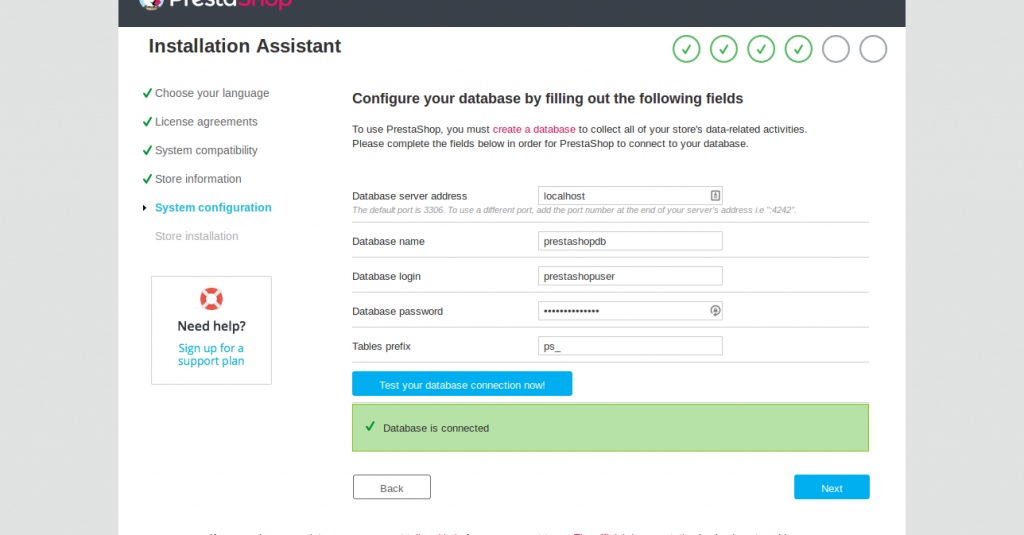
3. Cree una base de datos / usuario
Ahora cree una base de datos para la instalación de Prestashop. Creé una base de datos, a saber, prestashopdb y el usuario prestashopuser antes de la instalación. Puede hacerlo desde MySQL CLI o puede instalar PhpMyadmin y administrar bases de datos usando eso.
[root@server1 ~]# mysql
Welcome to the MySQL monitor. Commands end with ; or g.
Your MySQL connection id is 9
Server version: 5.5.48 MySQL Community Server (GPL)

Copyright (c) 2000, 2016, Oracle and/or its affiliates. All rights reserved.

Oracle is a registered trademark of Oracle Corporation and/or its
affiliates. Other names may be trademarks of their respective
owners.

Type 'help;' or 'h' for help. Type 'c' to clear the current input statement.

mysql> create database prestashopdb;
Query OK, 1 row affected (0.00 sec)

mysql> GRANT ALL ON prestashopdb.* TO prestashopuser@localhost IDENTIFIED BY 'prestashop123#';
Query OK, 0 rows affected (0.00 sec)

mysql> flush privileges;
Query OK, 0 rows affected (0.00 sec)

mysql> quit
Bye
4. Confirme la instalación de los módulos PHP GD, Mcrypt, Mbstring y PDO MySQL
Los módulos PHP como GD y PDO MySQL se instalan durante la configuración inicial de PHP. Necesito habilitar el módulo Mcrypt y MBstring para completar los requisitos previos para la instalación de Prestashop.
Instalación de Mcrypt:
Install EPEL repo for YUM
yum -y install epel-release
yum install php-mcrypt -y
Instalación de MBstring
yum install php-mbstring -y
Instalación de Prestashop
Descargar el última versión de Prestashop desde el enlace y extráigalo en la carpeta de inicio. Modifique los permisos de las carpetas / archivos a 755.
root@server1 home]# unzip prestashop_1.6.1.2.zip
root@server1 prestashop]# chmod -R 755 *.*
[root@server1 prestashop]# ll
total 160
drwxr-xr-x 2 root root 4096 Feb 23 09:45 Adapter
drwxr-xr-x 9 root root 4096 Feb 23 09:45 admin
-rwxr-xr-x 1 root root 12320 Oct 29 16:16 architecture.md
drwxr-xr-x 8 root root 4096 Feb 23 09:45 cache
drwxr-xr-x 17 root root 4096 Feb 23 09:45 classes
drwxr-xr-x 3 root root 4096 Feb 23 09:45 config
-rwxr-xr-x 1 root root 3617 Oct 29 16:16 CONTRIBUTING.md
-rwxr-xr-x 1 root root 5847 Oct 29 16:17 CONTRIBUTORS.md
drwxr-xr-x 4 root root 4096 Feb 23 09:45 controllers
drwxr-xr-x 4 root root 4096 Feb 23 09:45 Core
drwxr-xr-x 2 root root 4096 Feb 23 09:45 css
drwxr-xr-x 4 root root 4096 Feb 23 09:45 docs
drwxr-xr-x 2 root root 4096 Feb 23 09:45 download
-rwxr-xr-x 1 root root 2454 Oct 29 16:16 error500.html
-rwxr-xr-x 1 root root 1218 Oct 29 16:16 footer.php
-rwxr-xr-x 1 root root 1247 Oct 29 16:16 header.php
-rwxr-xr-x 1 root root 4717 Oct 29 16:16 images.inc.php
drwxr-xr-x 18 root root 4096 Feb 23 09:45 img
-rwxr-xr-x 1 root root 1068 Oct 29 16:16 index.php
-rwxr-xr-x 1 root root 1154 Oct 29 16:16 init.php
drwxr-xr-x 12 root root 4096 Feb 23 09:45 install
drwxr-xr-x 7 root root 4096 Feb 23 09:45 js
drwxr-xr-x 2 root root 4096 Feb 23 09:45 localization
drwxr-xr-x 2 root root 4096 Feb 23 09:45 log
drwxr-xr-x 3 root root 4096 Feb 23 09:45 mails
drwxr-xr-x 79 root root 4096 Feb 23 09:45 modules
drwxr-xr-x 5 root root 4096 Feb 23 09:45 override
drwxr-xr-x 2 root root 4096 Feb 23 09:45 pdf
-rwxr-xr-x 1 root root 6576 Oct 29 16:16 README.md
drwxr-xr-x 3 root root 4096 Feb 23 09:45 themes
drwxr-xr-x 18 root root 4096 Feb 23 09:45 tools
drwxr-xr-x 3 root root 4096 Feb 23 09:45 translations
drwxr-xr-x 2 root root 4096 Feb 23 09:45 upload
drwxr-xr-x 2 root root 4096 Feb 23 09:45 webservice

root@server1 home]# cp -rp prestashop/* /var/www/saheetha.com/public_html/
Ahora copie el contenido de la carpeta de prestashop desde / home a la raíz del documento del dominio requerido que debe ser nuestra tienda en línea. Es este camino «/var/www/saheetha.com/public_html/» en mi caso.
Ahora abra en su navegador la URL >>http://domain.com/install/
Navegue por las capturas de pantalla que describen cada etapa de instalación.
Etapa 1: Selección de idioma

Etapa 2: Acuerdo de licencia
Acepte los términos y condiciones del contrato de licencia y haga clic en «Siguiente» para continuar.

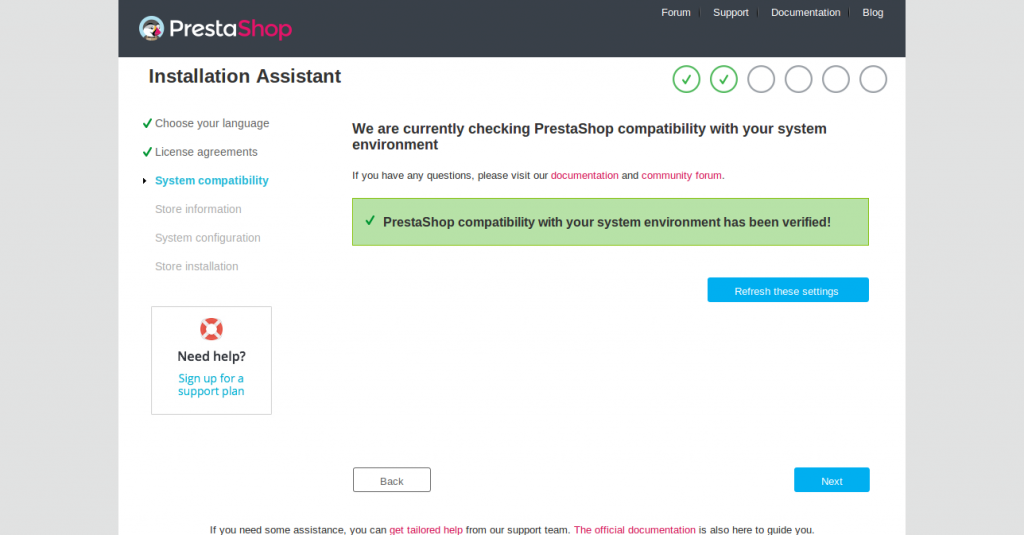
Etapa 3: verificación de compatibilidad del sistema
Verificará la instalación de los módulos PHP requeridos y los permisos de carpetas / archivos para continuar con la instalación.
Etapa 4: Creación de su propia información de tienda:
Etapa 6: Etapa de instalación

Etapa 7: Etapa final
Le proporcionará las credenciales de inicio de sesión para administrar su tienda en línea.

Ahora ya está todo listo con su instalación. Asegúrese de eliminar la carpeta «Instalar» de la raíz del documento de su dominio por razones de seguridad.
¿Cómo podemos acceder al panel de administración?
Antes de acceder al Panel de administración para nuestra instalación, debe cambiar el nombre de su carpeta «admin» en la raíz del documento del dominio de instalación a otro nombre por razones de seguridad. De lo contrario, recibirá un mensaje como este en el navegador mientras accede a su panel de administración.
For security reasons, you cannot connect to the back office until you have
renamed the /admin folder (e.g. admin847v0u8kk/)
Please then access this page by the new URL (e.g. http://saheetha.com/admin847v0u8kk/)
Cambié el nombre de mi carpeta de administración y accedí a mi panel de administración con las credenciales de inicio de sesión. Puede administrar sus productos, pedidos, clientes, detalles de precios, etc. desde esto.

Ahora puedes dirigirte al usuario de Prestashop manuales para obtener más información sobre cómo administrar su tienda en línea.
Verá lo fácil que puede crear una tienda web en línea con este software. Felicitaciones por su nueva empresa con tiendas electrónicas :). Espero que hayas disfrutado leyendo este artículo. Recomiendo sus valiosos comentarios y sugerencias al respecto.
¡Que tenga un buen día!